Download Virtualbox For Mac Os High Sierra
Out of all the Apple operating systems, macOS High Sierra is the most manageable and straightforward macOS installation on VirtualBox. Using the VMDK formatted file, we are taking a very intentional path to run the operating organisation in a virtualization environment.
Like our other guides, we volition try to provide simple steps to install macOS Loftier Sierra on VirtualBox on Windows PC. We've included screenshots for all the steps to help yous through the steps outlined below and have included a detailed video to lead you through the installation visually. You lot will discover the link at the lesser of the page.
What is VirtualBox?
VirtualBox, created by Oracle, is a comprehensive virtual automobile app similar to VMware Workstation merely packed with the essentials and provided gratuitous. This virtual machine application forms a sandboxed setting that can install some other operating system separately from the existing operating arrangement. This application makes the virtualization process relatively easy. While installing macOS High Sierra, nosotros will need to make some pocket-size modifications to ensure we go the maximum employ and the ability to use all its features.
macOS Loftier Sierra – Highlights and Features
Similar to Mojave, Apple builds on a solid platform to advance itself to include more than practical features. These new features permit users to piece of work more efficiently, manage their time better, and stay on task. Here are just a few of the highlighted features.
Photos
- Photos app started as a tool to maintain your photo library and sync pictures across devices through the deject. It's now a powerful editing software. There is a persistent sidebar that shows your library, Memories, Alive Photos, and albums.
- Refined system – here'due south a new filtering drop-downward in the list view, so you tin elevate-and-drop photos into an album or even to the desktop to export it.
Safari
- Block auto-playing videos – set preferences for private websites or block all autoplay altogether.
- Automated Reader manner – Fix Safari to Reader fashion blank-out the page and prove merely article content.
- Blocks adverts – Set preferences for individual websites or a block all autoplay altogether.
- Carve up-screen – Split View in Mail and to reply to an electronic mail while searching through your inbox.
- Peak Hits- Search much more than accurately and how recently you've read a message
Notes
- Highlighted search words – Easily locate a word in the results.
Siri
- Natural vox – more natural voices like iOS 11.
Music playback
- Get a personalized playlist and inquire information technology to play something based on a mood.
iCloud
- Improved family sharing – Everyone tin can use upwardly storage from the aforementioned storage program. Up to 200GB of iCloud storage at $2.99 per or 2TB is $9.99 a month
- Improved file sharing – iCloud Drive enables collaboration.
FaceTime
- Capture a Alive Photograph – capture a Live Photo using the other person's camera and mic on their Mac or iOS device. Users are notified whenever a Live Photo is taken. Simply look for the new shutter button
Install macOS High Sierra on VirtualBox
Please Notation: All images and files are created only for educational purposes. Whatsoever misuse of any files is non our responsibleness.
What y'all demand for this installation :
– 6 GB RAM (recommend 8 GB)
– 25 GB HDD (recommend 50 GB)
– At least a dual-cadre CPU (recommend Quad Core CPU)
– VirtualBox Windows and Expansion Pack (found here)
– macOS High Sierra VMDK paradigm file (plant here)
– Command file (download here)
– Screen Resolution File (download hither)
Earlier we begin, we presume that you lot already take VirtualBox installed on your Windows 10 PC, with the Extension Pack installed. If you accept not already done this, you can follow this guide or this video to y'all ready.
Part 1 – Download macOS Loftier Sierra
- To get the most updated re-create of macOS High Sierra, you can head over to Apple tree's support website and download the image. These image files are in the DMG format and must be converted to either an ISO file format or a VMDK file format to be used to install a virtual machine. This tutorial will be using the VMDK file format considering it allows for an like shooting fish in a barrel installation with VirtualBox. You tin can go a re-create of the VMDK file here. Once downloaded, keep the file in an hands accessible location.
Part 2 – Create Virtual Machine
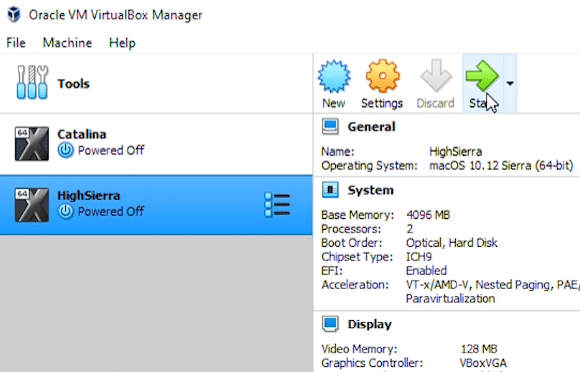
- Open the Oracle VM Virtual Box Managing director. At the main screen, select the 'New' icon at the summit

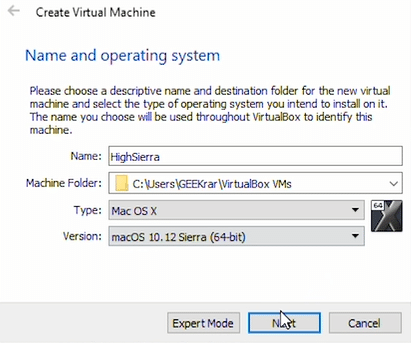
2. In the commencement window, under the 'Proper name' field, type in "HighSierra". Machine folder tin can remain as default. In the 'Type' driblet-down carte, select "Mac Os X". In the 'Version' drop-down menu, select "macOS 10.12 Sierra (64-fleck)". Click 'Side by side'
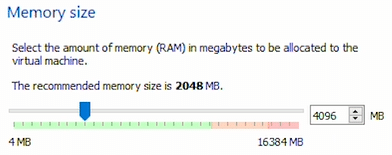
3. In 'Memory size', increase the available memory to for 4GB (4096 MB). Click 'Next'
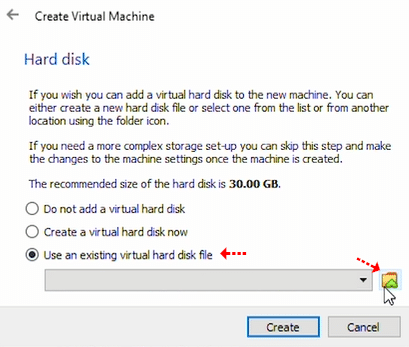
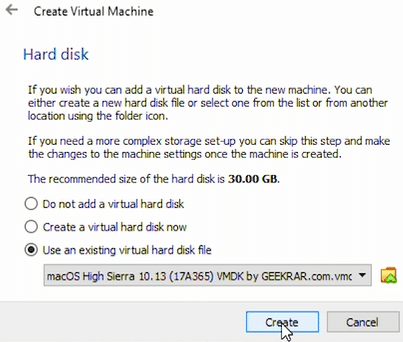
4. In 'Hard deejay' select the third pick, "Use an existing virtual hard disk file". Click on the folder icon, and find the High Sierra VMDK prototype file y'all downloaded in Function 1.
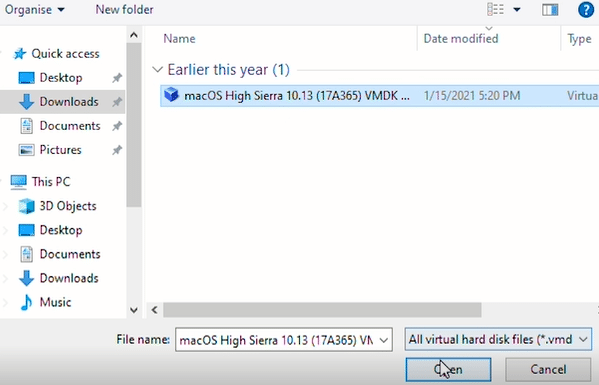
5. Once located, select the file, and click the 'Open' button.
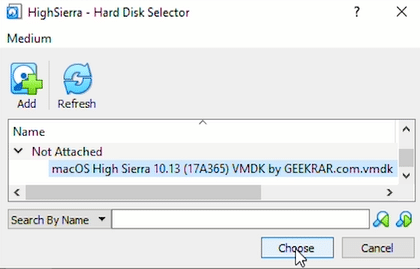
6. In the Hard Disk Selector, ensure you files is selected and click on 'Choose'
7. Dorsum at the Create Virtual Machine window, click on 'Create' button at the bottom.
Part 3 – Run Commands
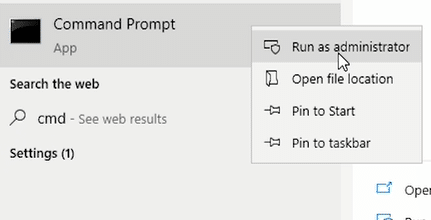
Now nosotros demand to change the VirtualBox Manager to allow the states to run the macOS High Sierra smoothly without errors. Open your control prompt window by click on the Offset push button and type in 'cmd'. Right-click on information technology and select 'Run every bit administrator.
- In the control prompt, run the first line to alter the directory to VirtualBox'due south default location.
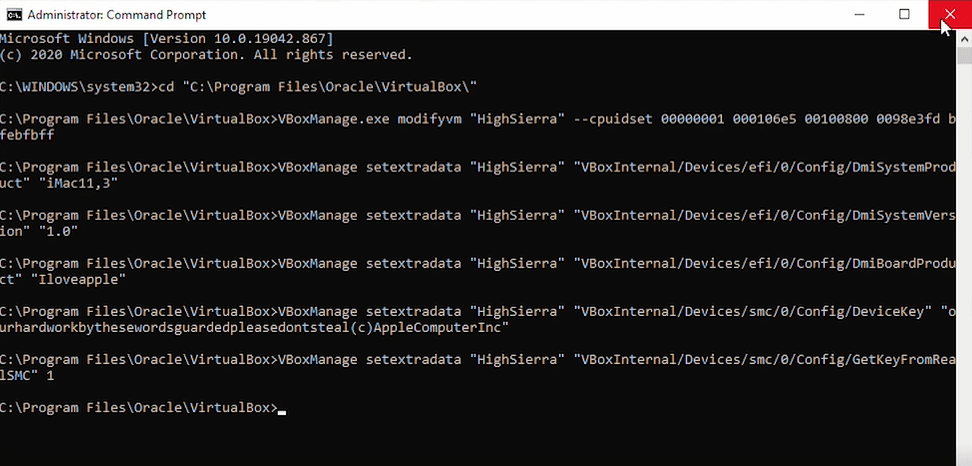
cd "C:\Program Files\Oracle\VirtualBox\"
2. Side by side, assuming yous named your virtual machine in Part 1 StepX "HighSierra" y'all tin copy and paste the below lines in the control window and hitting enter. If you have a name, change "HighSierra" with whatever you called it, but leaving the quotation marks.
VBoxManage.exe modifyvm "HighSierra" --cpuidset 00000001 000106e5 00100800 0098e3fd bfebfbff VBoxManage setextradata "HighSierra" "VBoxInternal/Devices/efi/0/Config/DmiSystemProduct" "iMac11,3" VBoxManage setextradata "HighSierra" "VBoxInternal/Devices/efi/0/Config/DmiSystemVersion" "i.0" VBoxManage setextradata "HighSierra" "VBoxInternal/Devices/efi/0/Config/DmiBoardProduct" "Iloveapple" VBoxManage setextradata "HighSierra" "VBoxInternal/Devices/smc/0/Config/DeviceKey" "ourhardworkbythesewordsguardedpleasedontsteal(c)AppleComputerInc" VBoxManage setextradata "HighSierra" "VBoxInternal/Devices/smc/0/Config/GetKeyFromRealSMC" 1 It will await similar to the below.
You lot can at present shut out of the command prompt and caput back to your VirtualBox Manager.
Role iv – Modify Virtual Machine Settings
We need to open the VirtualBox Director and modify a couple of settings as the last steps before installing macOS Loftier Sierra.
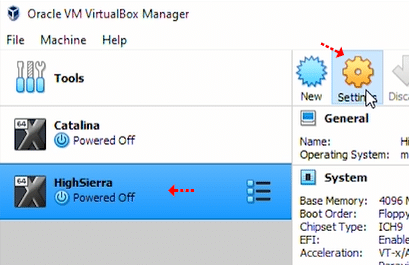
- Select the newly created 'HighSierra' virtual machine on the left side, then click on the orangish settings button at the superlative.
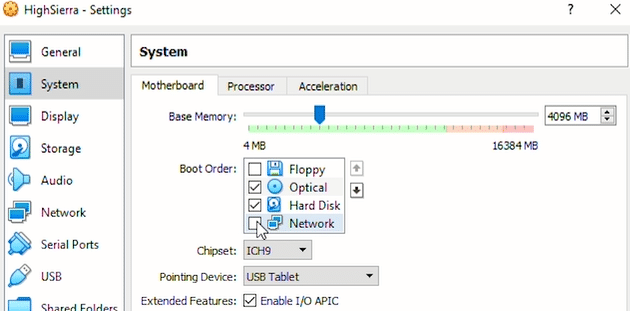
In the menu on the left, select 'Organization', and then click on the 'Motherboard' tab and ensure nosotros take at least 4096 MB (4GB) of retentivity. Below nosotros tin can uncheck the 'floopy' for Boot Society.
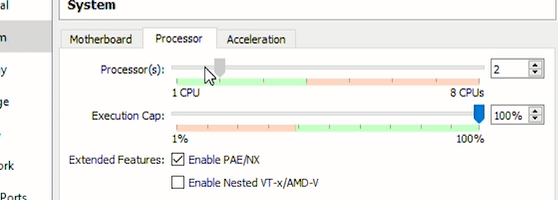
Click the next tab 'Processor'. Below increase the bachelor processors to atleast 2.
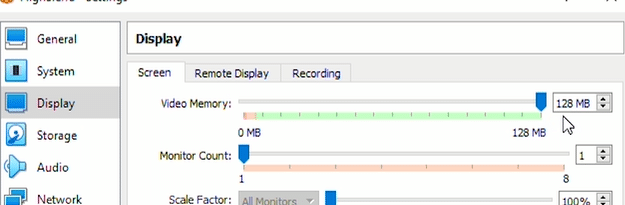
In the left side menu, select Display. Nether the first tab 'Screen' increment the available memory to the max bachelor amount.
Once complete, click the 'OK' to close the window.
Office five – macOS High Sierra Setup
At the master VirtualBox Director window, select the macOS High Sierra virtual machine on the left side, and click the greenish 'Start' push button to boot upwardly the machine.
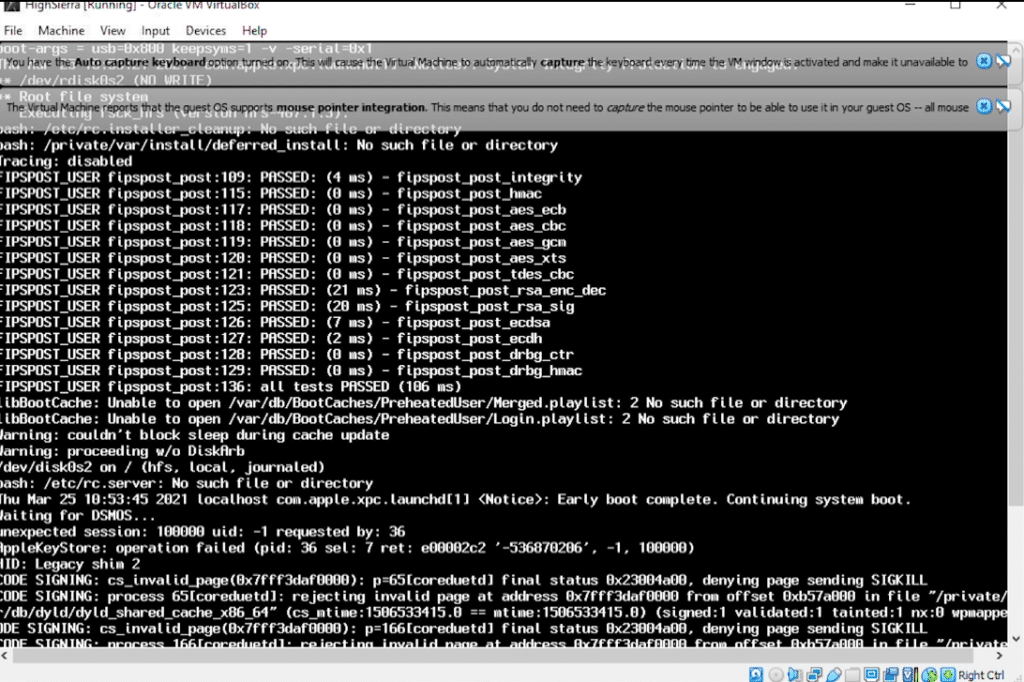
Equally the operating organisation boots up and loads the setup files, y'all will have a terminal window pop up, like beneath. This is entirely normal and will take a few minutes as it begins.
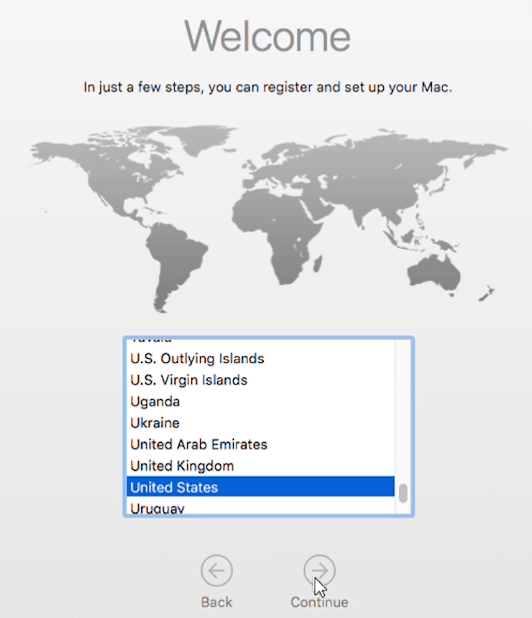
Once loaded, the first screen will enquire you to select your region. In this guide, nosotros volition exist using the U.s.a., simply y'all can utilize your preference region. Click go on.
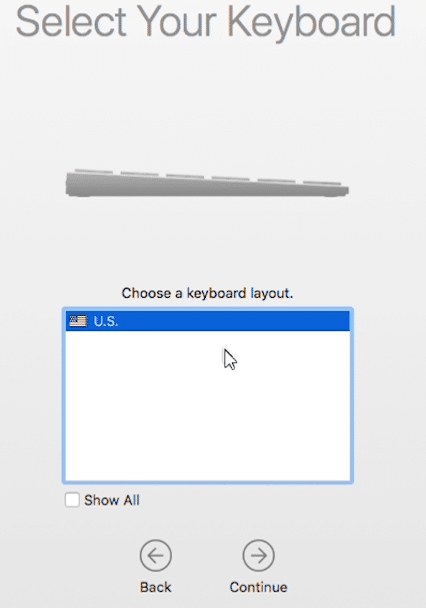
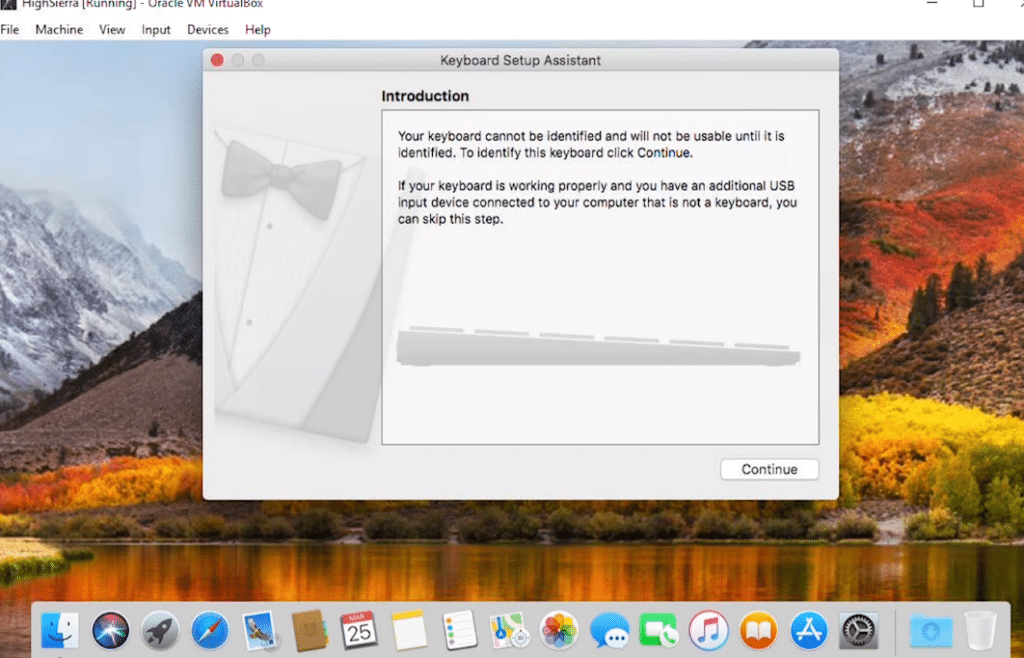
Next is the Keyboard layout. Yous tin can go out this every bit the default unless you lot require something unlike. Click continue.
<017>
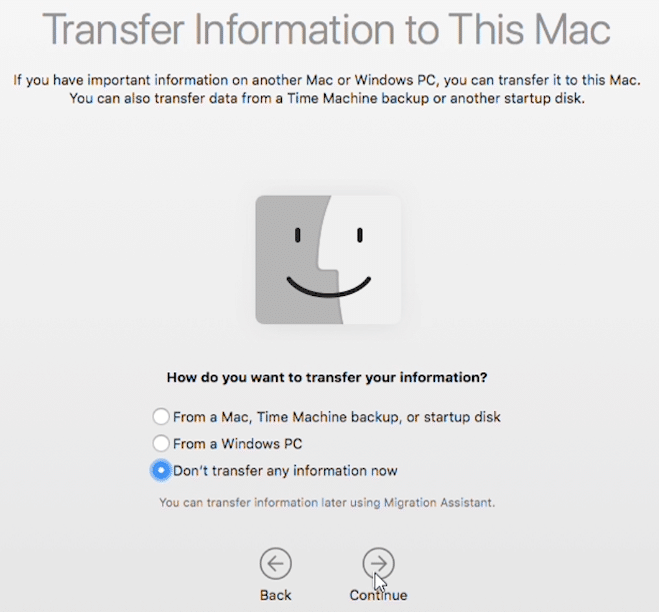
At the 'Transfer Information to this Mac' window, select the third option, 'Don't transfer whatever information now.' Click 'Continue'.
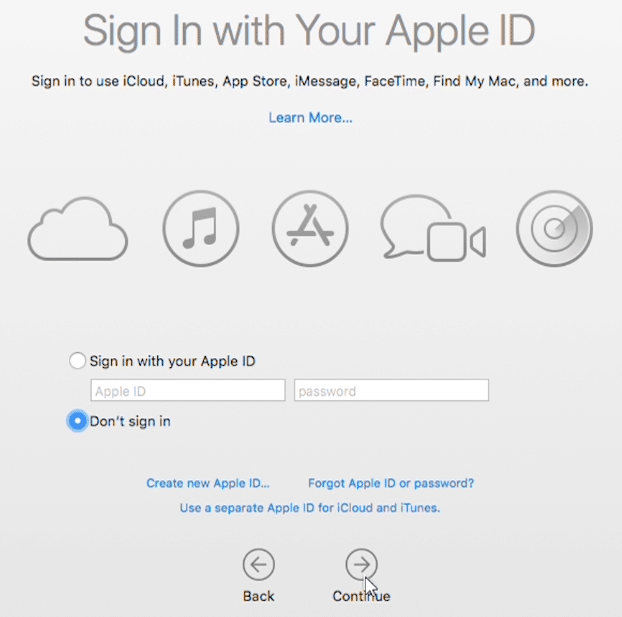
For the 'Sign In With Your Apple tree ID', select 'Don't sign in' and click on 'Go along.'
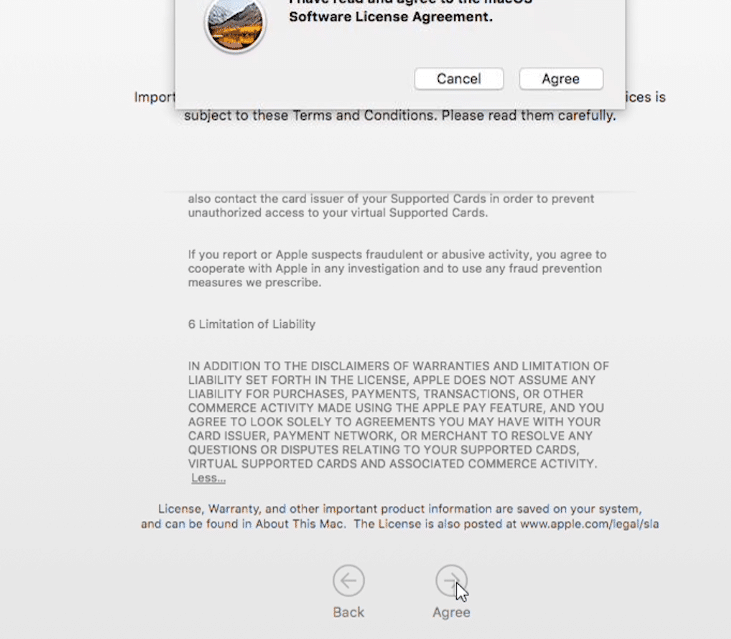
Y'all will need to select the 'Concord' option on both windows at the 'Terms and Atmospheric condition' window to proceed with the installation.
<020>
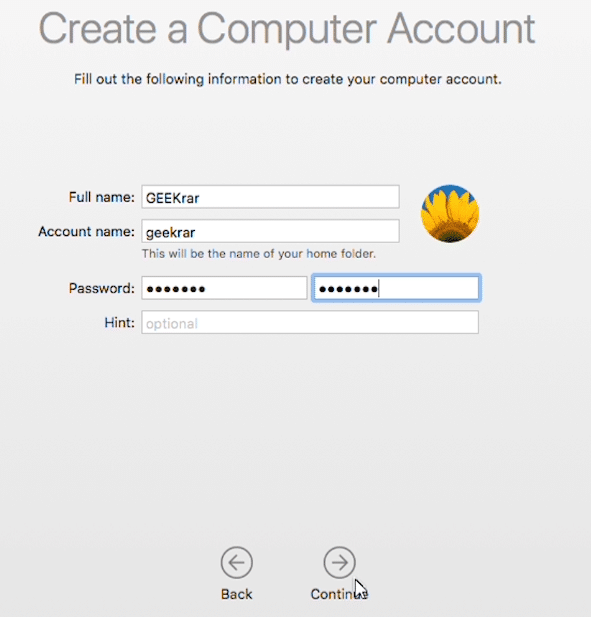
At the 'Create a Reckoner Account' window, yous volition be creating your user account and password. The user data here will be the main account for this operating organisation. Fill out the fields and click on 'Continue.'
<021>
In 'Limited Setup', leave the default selection and click on 'Continue.'
<022>

I last dialog box volition pop up as an introduction. Click on 'Continue' to close out the box, and at present you are at the desktop of macOS High Sierra. This concludes the installation of the operating system.
<023>
At this point, yous tin can kickoff using the macOS High Sierra as you please. Yous may notice that if you expand the window, it will non fill the screen. You may want to accept an actress step and change the screen resolution with the below method.
Office half dozen – Set Screen Resolution
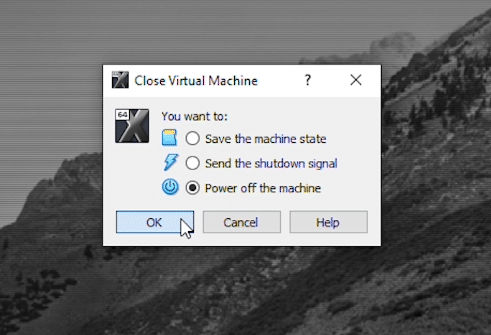
Earlier changing the screen resolution to the virtual machine, exit out of the virtual machine by going to the File carte du jour and selecting Close at the prompt, select 'Power off the machine'.
<025>
To go the best results, you will want to know the native resolution of your screen (i.east. 1080p is 1920×1080 or 720p is 1280×720) .
At the Windows desktop, click on the Start button and type in 'cmd'. Correct-click on it and select 'Run as administrator .'
In the command prompt, run the first line to alter the directory to VirtualBox'south default location.
cd "C:\Programme Files\Oracle\VirtualBox\"
At present you desire to modify the below line to fit your needs. "HighSierra" is the name of our virtual machine and can exist left as is. Where "ten" is, replace information technology with your screen size.
VBoxManage setextradata "HighSierra" VBoxInternal2/EfiGraphicsResolution "x"
The monitor we're using in this example is 720p, so it will look similar this.
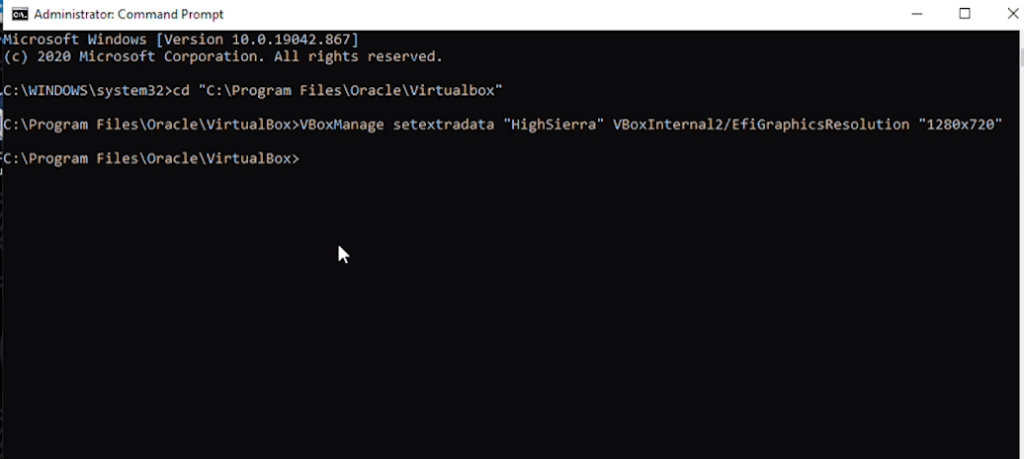
Once yous have, it typed in, hit enter and close out of the control prompt.
Go dorsum into the VirtualBox Manager, and start your virtual machine.
Every bit it loads up, the appearance should change. Once you have logged in, you can go the the 'View' menu at the top and select 'Full Screen Mode'.
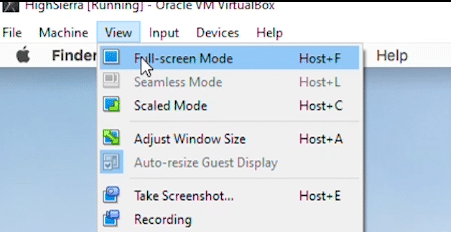
You have at present entered full-screen mode and take consummate the full installation of macOS Loftier Sierra on VirtualBox on Windows PC.
VIDEO – macOS High Sierra on VirtualBox on Windows PC
Hither is a visual guide to walk y'all through all the steps that nosotros just covered. If y'all need any assist with the installation or have whatever issues, you can put information technology in the comments below or put it in the forum.
DOWNLOAD HERE
Posted by: evanssinund.blogspot.com


0 Comments